Your Cart is Empty
English


Making your own simple small spoon is an ideal first carving project. It’s a good way to learn simple whittling techniques before moving on to more complex projects. A small spoon is also easy to scale up if you decide you want to try making larger camp or kitchen utensils, such as a ladle or scoop, as these items utilise many of the same wood-carving principles.
Choose your wood
First, choose your wood. For a small teaspoon, you’ll only need a piece slightly thicker than your thumb and no more than 5 or 6 inches long. Avoid branches with too many side shoots, as these will have formed knots in the wood.
For beginners, use green wood rather than older, seasoned wood. Green wood has more moisture content, making it softer and therefore easier to carve. In terms of species, sycamore is a great one to start with, since it is very common, easy to carve and has odourless and tasteless wood. Others might want to try alternative hardwoods – birch and fruitwoods are popular choices, though harder to work.
Choose your tools
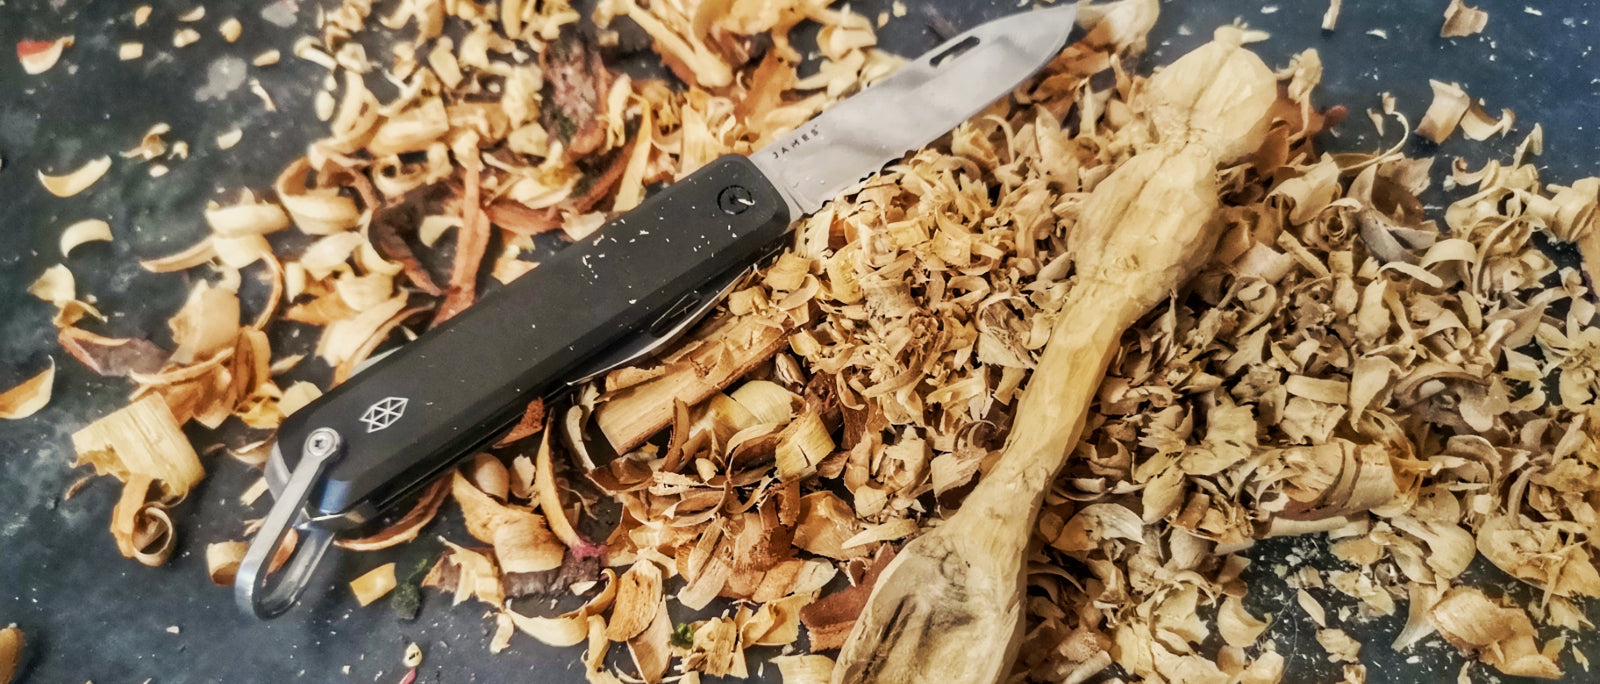
You can carve a simple spoon with just a couple of tools – namely, a small, sharp pocket-knife with a fixed or locking blade. This is much safer than a slipjoint folding knife or a penknife with a non-locking blade. It should feel comfortable in the hand, with no ‘hotspots’ that might cause blisters. Stainless steel or carbon steel knives are equally suitable for whittling, though a carbon steel blade is usually easier to sharpen.
Secondly, a spoon or crook knife, which has a curved blade, is useful for carving out the bowl of the spoon.
Split your branch
The next step is to split the section of wood straight down the middle, using a fixed blade knife and a baton (a heavier branch or log is ideal). Before you do this, take a look at the piece of wood and look for any natural curvature or similar features that you might want to use as part of the design of your spoon.
You should find that the wood will split nicely exactly down the central growth ring, which should be clearly visible as a darker line down the middle of each of the split halves.
Mark out your design
Take one split half of your piece of wood and draw the outline of a spoon with a pencil on the flat surface. Remember to leave a little extra wood at the bowl end, as you’ll need to remove plenty of wood at this end to form the spoon’s shape.


Rough out the spoon
Start to remove surplus wood by making slanted cuts across the grain, following the angle of the bowl of the spoon. Then, following the grain, shave away surplus wood either side of the handle down to your pencilled outline, turning the wood around in your hand to work from either end.
Shaping the handle and bowl
Repeat this process to gradually thin your spoon out, shaving away more and more wood. Initially, focus on creating the basic outline of the spoon. It is far easier to work on one horizontal or vertical plane at a time, so don’t worry about shaping the back of the handle or bowl until you have shaped the spoon as per your pencilled outline. Leave a little additional length at the bowl end of the spoon, as this will give you something to hold when trying to shape the spoon where the handle joins the bowl, enabling you to always cut away from yourself.
Next, you can carefully and steadily work on the depth of your spoon by taking wood away from the underside of the handle and starting to round off the bowl. When you are happy these elements, you can remove surplus wood from the tip of the bowl.
Finally, work on the top surface of the spoon. You may want to retain a flatter shape, or you may want to round off the handle. Now you are ready to hollow out the bowl.
Hollowing out the bowl
This is best achieved using a crook or spoon knife. Begin by using a scooping, twisting action right in the centre of the bowl, a bit like using an ice cream scoop. Once you have made a small depression begin working from both sides from the middle outwards, cutting across the grain. Continue until you have hollowed out the bowl to an even thickness. You can hold the wood up to the light to assess the thickness of the bowl – don’t make it too thin or you may hollow straight through it!
Finishing your spoon
The last step is to sand your spoon. Start with a coarse (60 or 80) grit and work through medium (100 or 120) and fine (240) grits. This step takes patience, but persevere. You’re nearly there!
To finish your spoon and protect the wood, lightly coat it with a food-grade oil. Olive oil and rapeseed or vegetable oils can be used. This will also help to bring out the grain.