Your Cart is Empty
English


The art of ‘bivvying’ – sleeping outside without a tent – is a wild one. Quite literally. It exposes a person to the full force of nature, unpredictable weather patterns and harsh upland environments. To bivvy is to merge with an amalgamation of moss and rock and wind. To surrender to the mountains, all while being in our most vulnerable state.
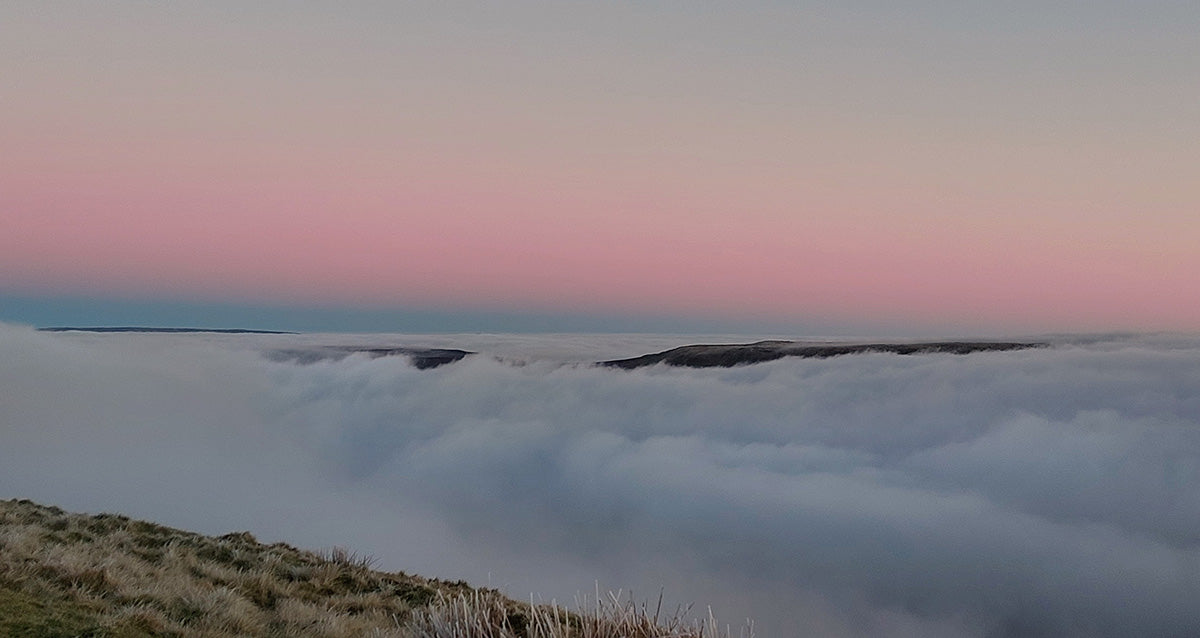
The idea of bivvying in winter may seem absurd, and for good reason. From sub-zero temperatures and brutal blizzards, to seething storms that pound the hillsides with rain, the degree of exposure is greatly amplified in winter. Yet this is precisely what makes a winter bivvy so enticing. It is a chance to experience nature in its most authentic form, to be tested, trialled, challenged, and to experience the rare trophies of winter magic. Cloud inversions, starling murmurations, nacreous clouds and the aurora borealis are just a few treasures that can be seen whilst winter bivvying. Though challenging, it is a wonderful experience that every keen wild camper should try. If you’re wondering how to go about bivvying in the winter, then this guide is a good place to start.
The priority for all winter bivvying kit is that it retains your warmth. In cold temperatures the body loses heat very easily, so the goal is to trap as much air as possible and prevent that warm air from being replaced by cold air. Other ways of losing heat need to be mitigated too. Heat loss will be exacerbated by wind and evaporation, which may be from sweat or condensation. When selecting winter bivvying kit, it is therefore wise to consider the following:
A four-season sleeping bag is the core element of a successful winter bivvy. Down sleeping bags have long been the go-to choice amongst mountaineers, for good reason: down contains thousands of tiny air pockets that trap air and retain heat, maintaining warmth in even the coldest temperatures. It is also lightweight and packs down extremely well. However, it doesn’t perform as well as synthetic materials when wet, so it may not be the best option if you’re planning on sleeping out in the rain.
The insulating properties of a sleeping bag can be amplified by two additional items. A sleeping bag liner helps to retain heat further, and how much heat this retains is heavily influenced by the material of the liner. Synthetic Thermolite liners tend to be warmest, followed by merino wool and then silk. Cotton liners perform poorly in cold temperatures so are best avoided.
Another major source of heat loss is conduction to the ground. This is greater in winter, when the ground is usually frozen. A good sleeping mat is therefore not only about giving you a comfy bed for the night – it is absolutely essential in minimising the amount of heat lost to the ground. The ‘R-value’ of a sleeping mat is a measure of how effective the mat is in preventing heat loss, and for winter bivvying you’ll want a mat with an R-value of 4+. The R-value can also be extended by combining two mats together. I use a folding closed-cell foam sleeping mat as a base, with an inflatable sleeping mat on top for extra insulation. Using the foam mat as a base also helps prevent my more expensive insulated mat from punctures.
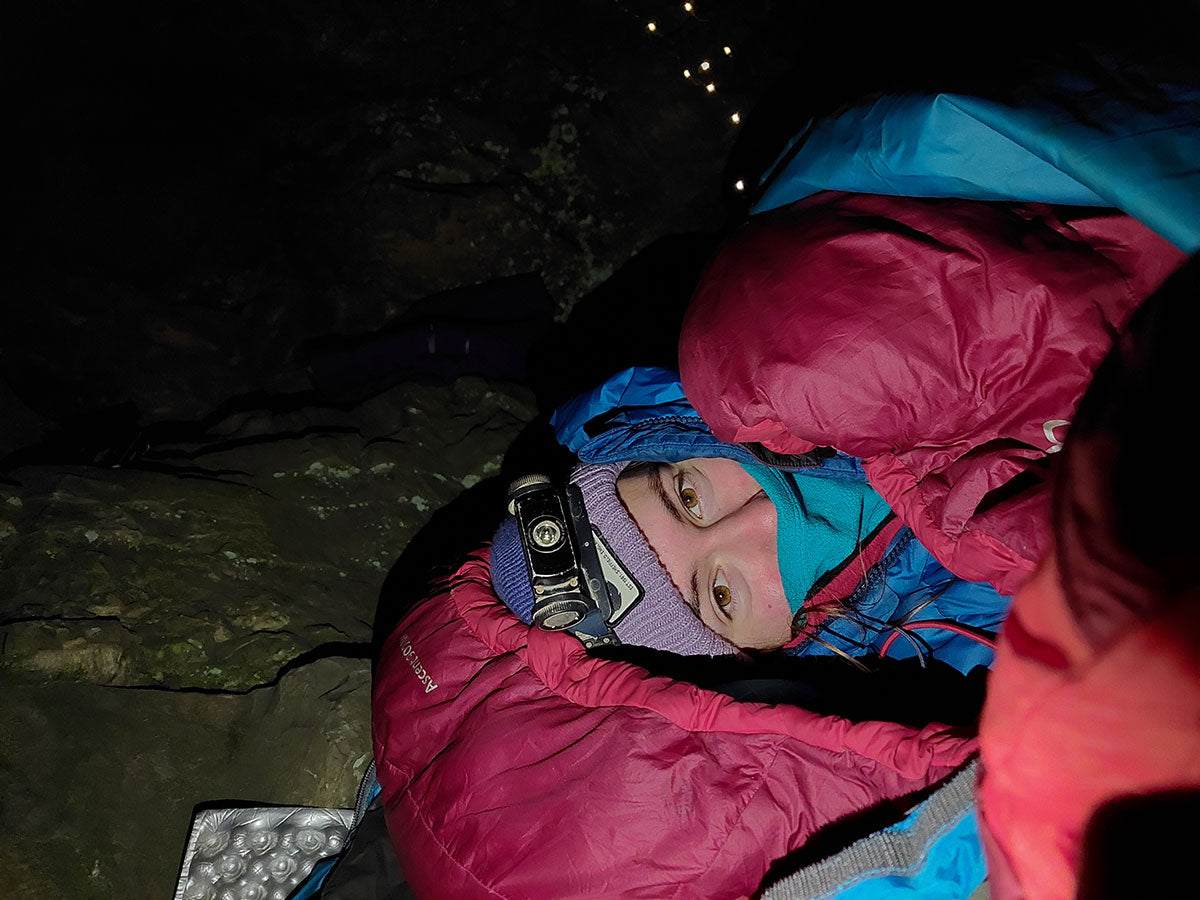
A winter bivvy must, of course, include a bivvy bag. These come in a wide variety of shapes and sizes, but the most important factors to consider are whether a bivvy is waterproof, ventilated and windproof. A bivvy bag serves several purposes when sleeping outside in winter. It traps more air, keeping you warmer. It acts as another layer between you and the frozen ground. And it protects you from wind, rain and snow. Effectively, a bivvy bag is what gives you protection from harsh and unpredictable weather in the absence of a tent.
When it rains, the bivvy bag will need to be zipped up fully, and this is where good ventilation comes in. Without it, condensation will build up and result in your kit getting wet anyway! Most bivvy bags will still have some condensation on the inside when fully zipped up, but those with good ventilation will have less condensation than those without.
Some people would consider an inflatable pillow to be a luxury item, but for me it is a central component to an enjoyable winter bivvy. It adds considerable comfort whilst being incredibly lightweight and only takes up a miniscule amount of space. As well as preventing neck ache, it means that rather than stuffing clothes into a dry sack for a makeshift pillow, all of your spare layers are available should you need them to keep warm during the night. Moreover, it keeps your head further away from the frozen ground and reduces the loss of heat through conduction even further.
A tarp is also a popular item amongst some bivvyers, although I rarely use mine because I prefer natural shelters (see below). Tarps provide additional shelter from rain and provide a wider area of shelter to keep the area around your bivvy (which may include your rucksack) dry. It’s always a good idea to carry a tarp with you in winter, since they pack down small and don’t weigh much. Even if the forecast is clear, rain can still arrive in the middle of the night with little warning. A tarp is also a useful supplement for natural shelters. For example, it can be strung between two boulders to create a more sheltered space.
As with all outdoor winter sports, the layering approach to clothing is key. Good layering will keep you as warm as possible, enabling a comfortable night’s sleep in sub-zero temperatures. Base layers should be made of a warm material that is also good at wicking moisture away from your body, such as merino wool, as this will prevent heat being lost through evaporation.
I usually wear my walking trousers and fleece on top of my base layers because it saves getting changed in the morning and I run cold anyway. Depending on the rating of your sleeping bag and how hot you run, you may wish to sleep in only base layers. Keeping the extremities warm can be a challenge in winter, so gloves or mittens and thick, loose-fitting socks that don’t restrict circulation are a must. I often wear down slippers (sometimes called hut booties) on top of these.
It can be tempting to bury your face into a sleeping bag to keep warm, but this is a sure-fire way to create condensation and subsequently lose heat through evaporation. Even in strong sub-zero temperatures, I always leave my face out of the bivvy bag, not only to reduce the risk of condensation but also so that I can experience the hillside more deeply. By using a combination of a thick insulating hat and a breathable Buff pulled over my nose, I am able to listen to the north wind running its fingers through the heather without compromising my vital warmth.
A few supplementary items are good for ‘emergency layering’, if the chill-factor starts to get extreme. I always bring a down jacket, which I wear around camp, and can wear inside my down sleeping bag if things get really dire. I once fell asleep in my down sleeping bag whilst bivvying in -8°C and woke up in the middle of the night because I was too hot! An emergency survival bag and silver heat-reflective blanket are also essential parts of my emergency kit whilst winter bivvying. I’ve never had to use them, but it’s comforting to know that I’m prepared for the very worst storms.
A little more thought needs to go into where you’re sleeping for bivvying in winter compared to bivvying in the summer. In exactly the same weather conditions, a change in location could be the difference between a painful night and a comfortable one. As mesmerising as sweeping views from exposed plateaus are, search for places of natural shelter. These include:
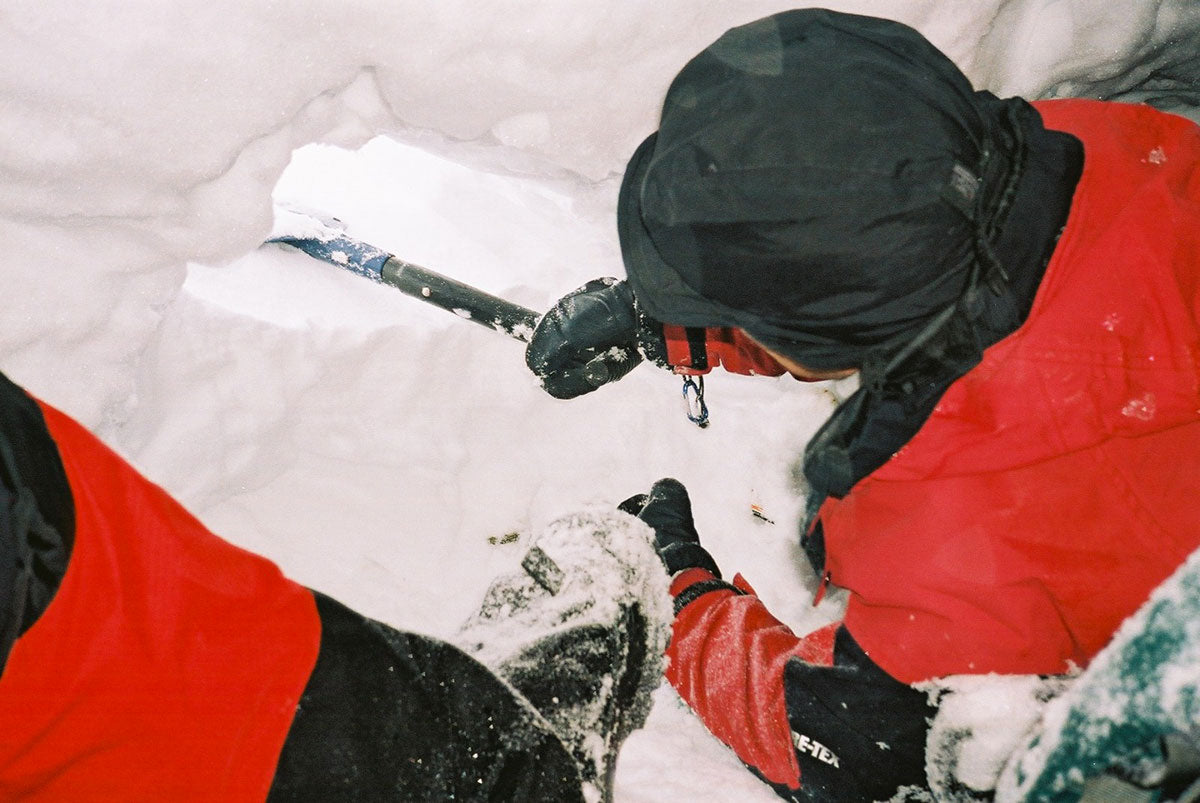
Shelter can also be created with winter’s most revered resource: snow. Whether digging a coffin-shaped pit in the snow, constructing a wall out of snow or excavating a snow hole, many forms of shelter can be created with snow and a shovel.
Anything that shields your bivvy spot from the wind will help, though places that provide some overhanging shelter (such as large boulders, caves and snow holes) are even better as they provide protection from precipitation as well.
Altitude will also affect how warm your bivvy spot is. Temperature decreases with altitude, so bivvying at 800m will be significantly colder than bivvying at 100m. It is wise to try winter bivvying at lower altitudes first, before venturing higher up the fell. A lower altitude will usually also mean a shorter walk-in, an easier escape route if the experience turns sour, and a greater availability of natural shelter.
The weather drastically impacts the type of bivvy experience, more so than camping due to having more exposure to the elements. A pleasant winter bivvy is as much about good timing as it is about a good location and good kit.
Wind direction, in addition to wind speed, is an important factor to keep an eye on. Some shelters, such as crags or rock shelters, may not provide much protection if the wind is blowing into them. Others, such as old shielings, will have walls facing different directions and provide some degree of shelter no matter which direction the wind is blowing in.
Temperature drops with altitude and so a higher bivvy will be colder than one lower down. The impact of altitude on temperature varies according to air pressure and water vapour. When it is damp during low pressure periods, the temperature will decrease on an average of 0.5°C per 100m of ascent gained. However, in drier air, such as during a high-pressure period, the temperature may decrease by around 1°C per 100m gained.
Low pressure will typically bring warmer temperatures, but is also likely to bring precipitation. Overhanging shelters and/or using a tarp will be especially valuable during low pressure to keep your bivvy spot dry. High pressure, on the other hand, will bring drier weather but colder temperatures. Overhanging shelter may be less crucial, but you’ll still want to stay out of the wind: if the air temperature is already -10°C, the wind chill will be even worse!
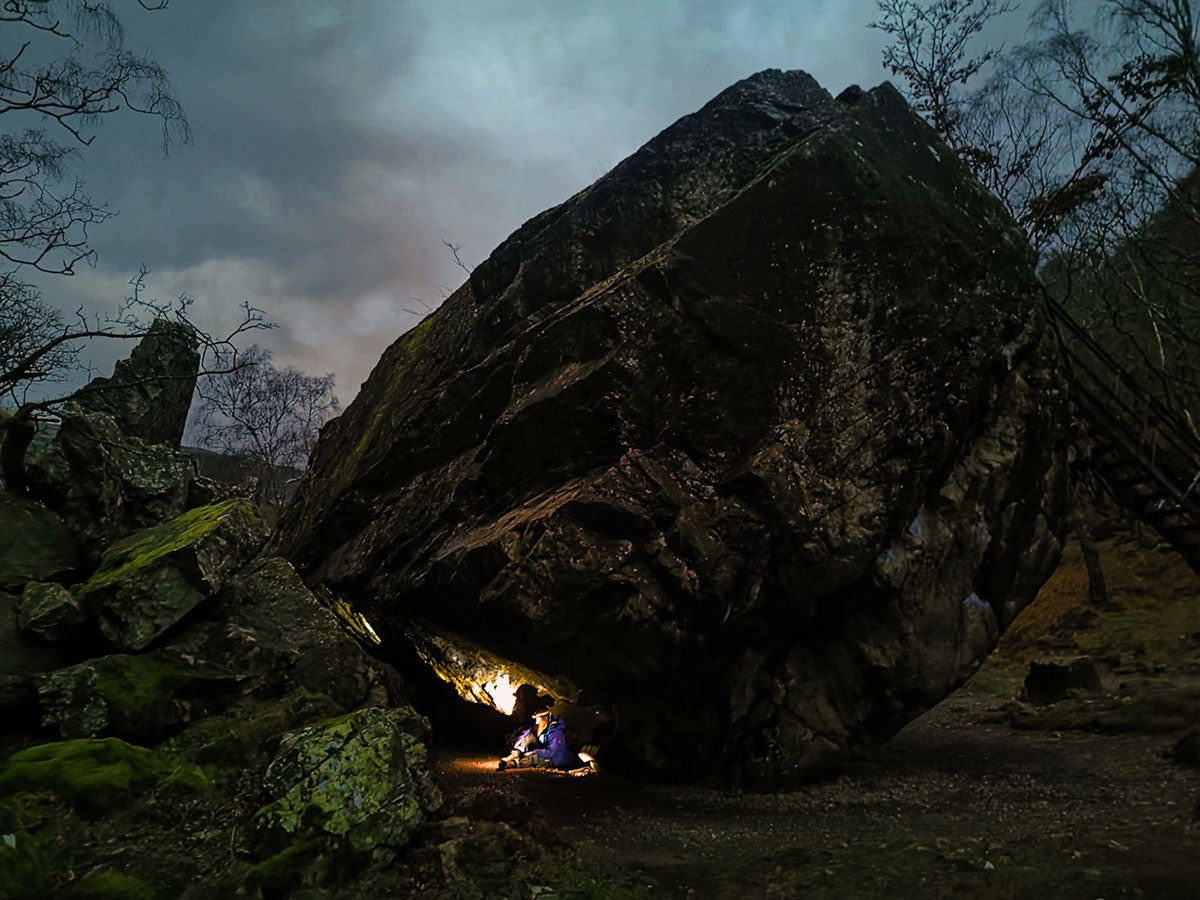
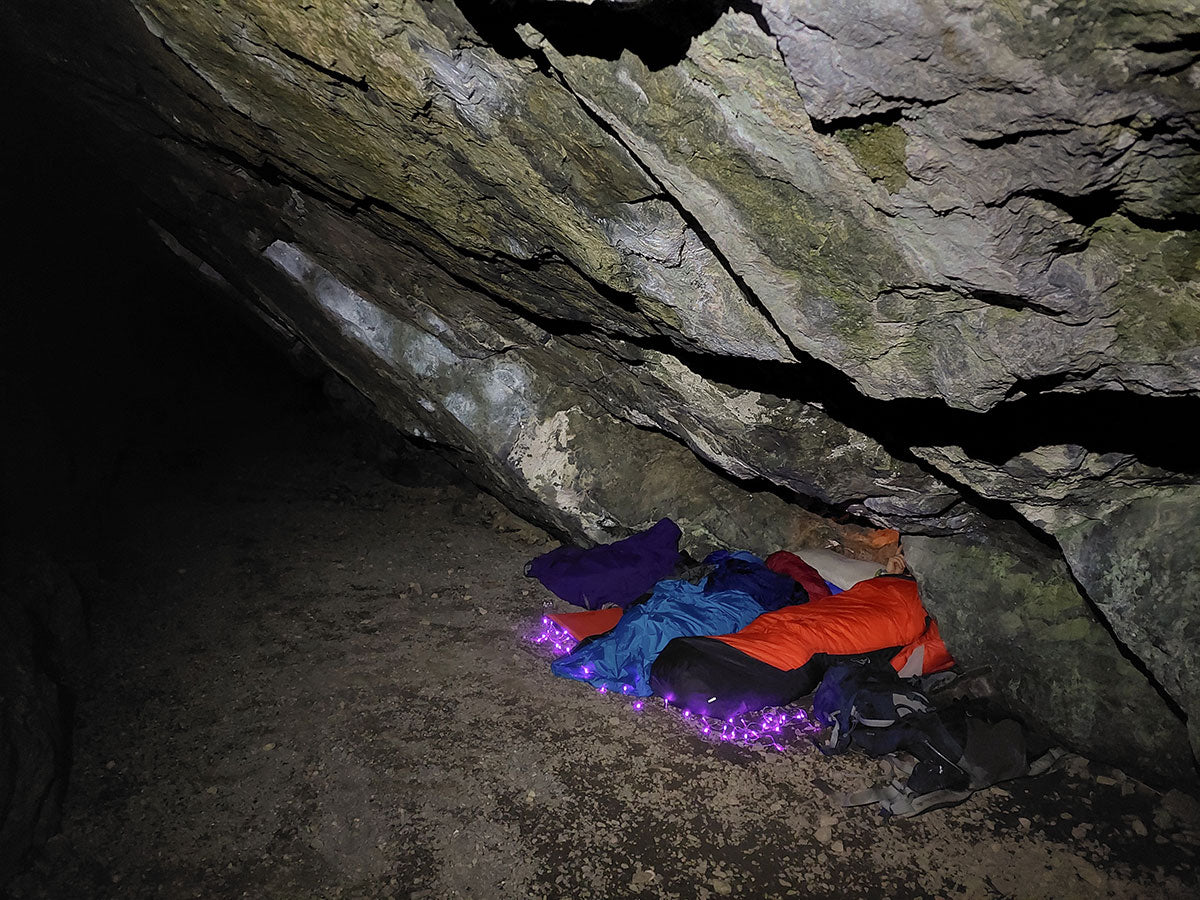
Here’s an example. In mid-December last year, I bivvied in the Lake District during a low-pressure period. I nestled into a nook underneath a giant boulder in the valley, cocooned in my usual winter bivvying layers, and watched the light of a single candle flame dance across the rock until I drifted off to sleep. When the sound of heavy rain woke me up, I anxiously checked the area around me, expecting my bed to have turned into a puddle. But the area stayed completely dry – not a single drop of water landed on me. The temperature didn’t drop below 7°C all night, and I stripped most of my layers off to prevent overheating. Lying beneath this lump of ancient lava, I did not feel damp, windswept or exposed at all despite the storm raging ferociously around me. For over 10,000 years this boulder had stood there: weathered, isolated, proud. I felt held by its presence, and it protected me just as well (if not better) than any tarp could have done. As the rain kissed the earth and the trees trembled in the wind, I drifted back off to sleep.
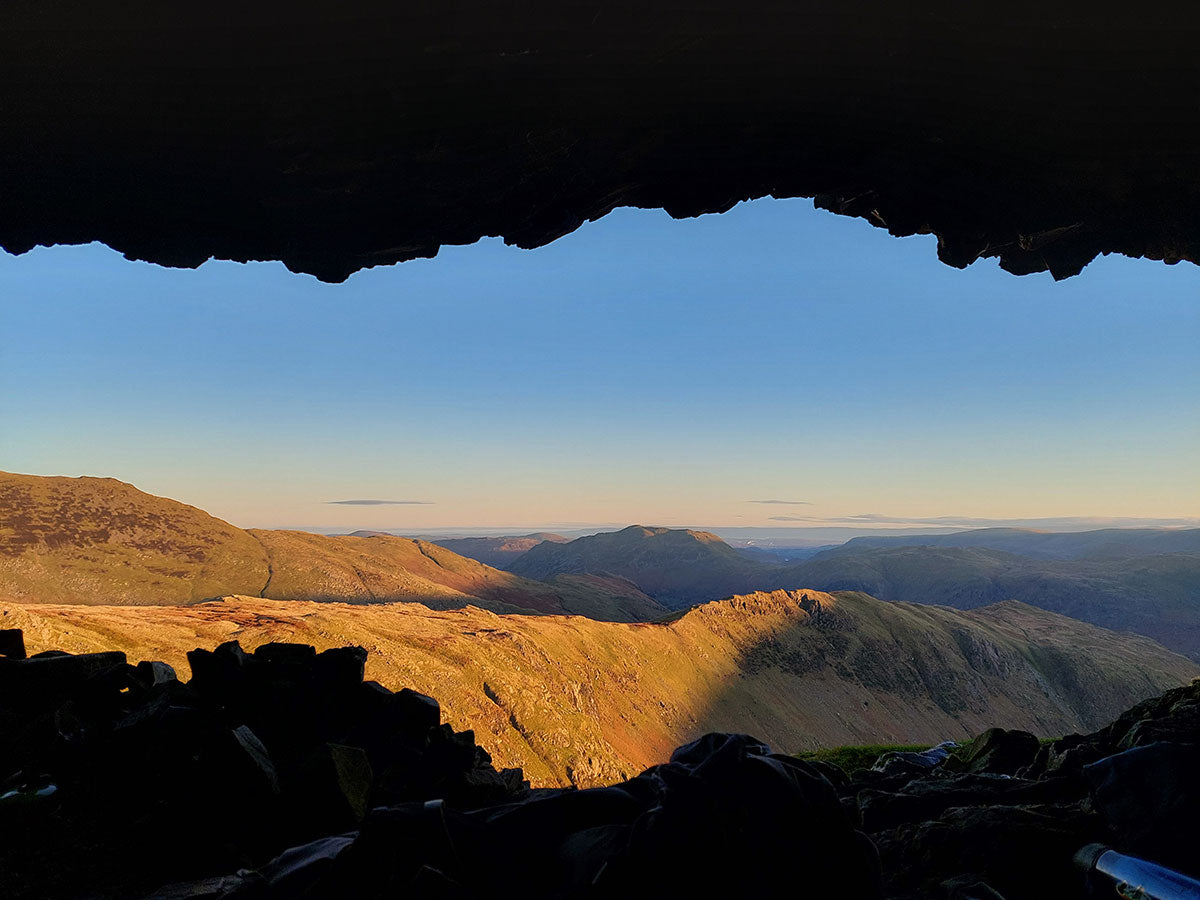
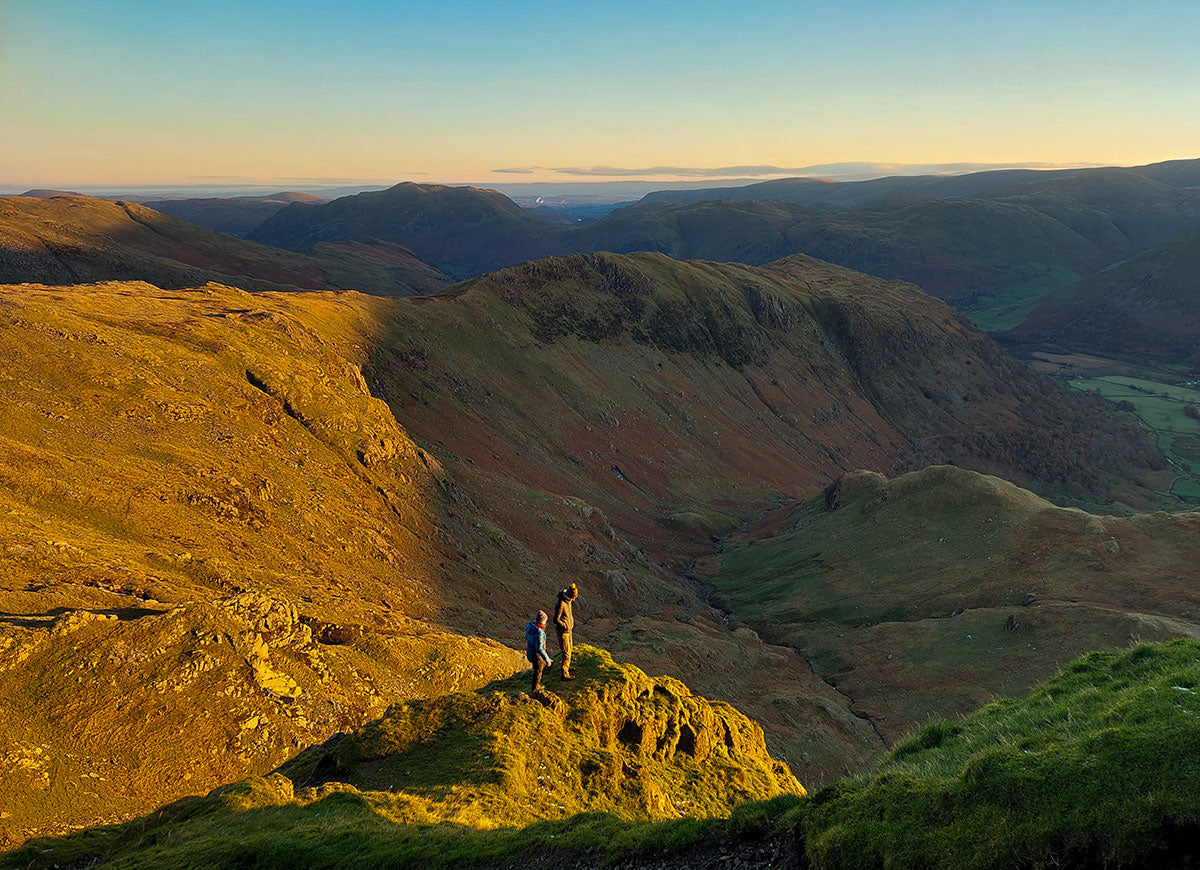
In mid-December this year, I bivvied in the Lake District during a high-pressure period. I carried a full 65-litre pack up Swirral Edge in the snow and walked over several Wainwrights in glittering winter sun to get to my bivvy spot for the night. This was a small rock shelter halfway up a tall cliff, a mere crack in the crag above an empty void. It is a popular location and a small dry stone wall has been built across the entrance to curb the wind. In other, more obscure rock shelters, I often build a makeshift wall myself with available scree. The day waned into night. As cotton candy clouds drifted across a deep pink sky, the valleys darkened beneath me and the temperature dropped steadily to around -7°C. I got into my sleeping bag as soon as I stopped moving to retain heat: a long night lay ahead. With around 2 hours between sunset and sunrise, I was extremely grateful to have exhausted myself during the day so that I could go to sleep early. To stay warm, I fell asleep wearing my down jacket inside of my down sleeping bag. This, it turns out, was entirely unnecessary because I woke up sweating at 1am! After shedding a few layers I slept soundly until dawn. It was a still morning. From the peak of a precipice, I watched a starling murmuration sweep across the horizon while the sun spread honey over the hills.
Although both of the above winter bivvies occurred in the same region, at the same time of year, there are several differences between them. The first bivvy was beneath a huge boulder in the valley, while the second was in a small crevice part-way up a crag. The first bivvy was during a low-pressure period, while the second was during a high-pressure period with considerably calmer yet colder conditions. The first bivvy was also around 430m lower than the second. However, in both cases, I was too warm. This demonstrates that with the right kit and planning, bivvying in -7°C doesn’t need to feel much different to bivvying in +7°C. Both experiences felt wild, magical and mesmerising for different reasons.
Blogs, books and word of mouth are all further sources of additional tips and tricks for winter bivvying. However, the best teacher of all is experience. No article can compare to the value of getting out there and discovering what works for you. Here are a few tips that I’ve learnt over the years:
 |
 |